Wednesday 27 July 2016

Behind the Scenes | ATG Droplet [Servlet Bean] Internal Processing

Today found some interested information about ATG droplet processing.


When a JSP executes a servlet bean, the dsp:droplet cycles through its code internally several times in order to arrange the servlet bean code in a manner that is cohesive with the expectations of open parameters.

For example below code.
<dsp:droplet name="/atg/dynamo/droplet/ForEach"> 
  <dsp:param name="array" bean="/samples/Employees"/>
     <dsp:oparam name="output">
        <dsp:valueof param="element.name"/>
     </dsp:oparam>
 </dsp:droplet>

Processing Steps :

1. The dsp:droplet tag is called.

2. dsp:droplet allows its body to be executed once. During that execution, the nested input parameter tags (in this case, just array) pass their information back to dsp:droplet, which uses it to construct a table of input parameter names (array) and values. The open parameter tags are ignored during this phase.

3. dsp:droplet finds the servlet bean referenced by the dsp:droplet “name=" property (forEach) and calls the servlet bean’s service() method with the input parameter values collected during step 2.

4. As the servlet bean executes, it halts calls to setParameter and serviceParameter, and instead records them as a list of DropletActions. These methods are organized in a manner that is readable by the open parameters that process them and are made available to open parameters for execution.

5. The dsp:droplet parses through each setParameter and serviceParameter method in DropletActions.
  • setParameter directs the dsp:droplet to set the specified request parameter to the recorded name (ouput) and value (element).
  • serviceParameter instructs the dsp:droplet to allow its body to be executed. This causes the related open parameter to run.
6. After the dsp:droplet finishes the DropletActions list, servlet bean execution ends.

Sunday 10 July 2016

Debug\Change Log Levels of CAS Crawls

CAS service logs messages for crawls in cas-service.log.

Below are the valid logging levels.

     DEBUG, INFO [Default logging level], WARN, ERROR, FATAL, OFF 

You can easily change logging level for crawls using one of the below methods.

1. Workbench CAS Console.

From endeca Workbench CAS Console you can change log levels of particular crawl. Here no CAS service restart required. 

Select crawler from CAS Console. Then click on advance settings to change log level. Once log level is updated. Click on apply and save. Now run the crawl again.

CAS Crawl Log Configuration
 

2. CAS Log configuration file [Change here will impact all crawls].

<install path>\CAS\workspace\conf path contains property files for logging configuration.
  • cas-cmd.log4j.properties
  • cas-service-log4j.properties : For crawls modify this file[Change log4j.logger.com.endeca.itl=INFO].
  • component-manager-cmd.log4j.properties
  • recordstore-cmd.log4j.properties
After change in configuration file you need to restart the CAS service.

Log files location : <install path>\CAS\workspace\logs

Log Rolling : CAS Service log rolls once it exceeds a size of 100MB, and the CAS Service keeps 10 backups of its log.This is also configurable.

Note : If you delete the log file, the Endeca CAS Service recreates the log only when you restart the service.

Saturday 9 July 2016

ATG 11.1 | Create Endeca application based on CRS

Sometime you need to create Endeca application based on CRS.

Follow below steps as command line log to create new application [Here Store application created].

CRS deploy.xml location : <CRS Installation Folder>\Store\Storefront\deploy\deploy.xml
=========================================================================
C:\Endeca\ToolsAndFrameworks\11.1.0\deployment_template\bin>deploy.bat --app C:\ATG\ATG11.1\CommerceReferenceStore\Store\Storefront\deploy\deploy.xml

 ------------------------------------------------------------------------------
   Found a supported version of Platform Services installed in directory
   C:\Endeca\PlatformServices\11.1.0. If the location is incorrect, type 'Q' to
   quit and adjust your ENDECA_ROOT environment variable. Press enter to
   continue with these settings.

   Continue?
 ------------------------------------------------------------------------------
     Deployment Template installation script.

     This script creates the directory structure for your
     deployment and installs configuration files and scripts
     into the directory structure.

07/06/2016 17:02:47 [deploy.pl] INFO:  Starting deployment template installation.

 ------------------------------------------------------------------------------
   The following app modules were specified on the command line argument:

   C:\ATG\ATG11.1\CommerceReferenceStore\Store\Storefront\deploy\deploy.xml


   Modules may be deployed standalone or on top of a base deployment type. Do
   you want to install a base deployment with the specified module(s)?

   Install base deployment? [Y/N]:
Y
07/06/2016 17:02:51 [AppDescriptorReader] INFO:  Parsing application descriptor
   file
   C:\ATG\ATG11.1\CommerceReferenceStore\Store\Storefront\deploy\deploy.xml.
07/06/2016 17:02:51 [AppDescriptorReader] INFO:  Parsing application descriptor
   file
   C:\Endeca\ToolsAndFrameworks\11.1.0\deployment_template\app-templates\base_descriptor.xml.

 ------------------------------------------------------------------------------
   Enter a short name for your application.

   Note: The name must conform to this regular expression: ^[a-zA-Z0-9]+$
    [default: CRS]

   Choosing a different application name may require additional configuration on
   your web application.

   Application name:
Store

 ------------------------------------------------------------------------------
   Specify the path into which the application will be deployed. The specified
   directory must exist and cannot contain spaces.

   For example, to deploy into c:\apps\Store, specify the path as c:\apps.

   Deployment directory:
C:\Endeca\apps

 ------------------------------------------------------------------------------
   Specify the port on which the Endeca Application Controller is running. This
   is configured in the server.xml file in the workspace of the Endeca software
   install and should be the same for all applications deployed in this
   environment. Ports must be in the range 1024-65535 [default: 8888].

   EAC port:

07/06/2016 17:03:26 [deploy.pl] INFO:  Deploying application into
   C:\Endeca\apps\Store

 ------------------------------------------------------------------------------
   Enter the port where workbench is running. [Default: 8006]

 ------------------------------------------------------------------------------
   Enter the port to use for Dgraph1. [Default: 15000]


 ------------------------------------------------------------------------------
   Enter the port to use for AuthoringDgraph. [Default: 15002]


 ------------------------------------------------------------------------------
   Enter the port to use for LogServer. [Default: 15010]

 ------------------------------------------------------------------------------
   Please enter the CAS install directory using Unix-style forward slashes,
   including the version number (e.g. C:/Endeca/CAS/11.1.0).
C:/Endeca/CAS/11.1.0

 ------------------------------------------------------------------------------
   Please enter the version for CAS jar files (or hit 'enter' to use the
   default).  [Default: 11.1.0]

 ------------------------------------------------------------------------------
   Please enter the hostname where CAS is running (or hit 'enter' to use the
   default). [Default: localhost]

 ------------------------------------------------------------------------------
   Please enter the port where CAS is running (or hit 'enter' to use the
   default). [Default: 8500]

 ------------------------------------------------------------------------------
   Please enter the language code to use (or hit 'enter' to use the default).
   [Default: en]

 ------------------------------------------------------------------------------
   Please enter the fully-qualified Workbench hostname, including domain.
localhost

 ------------------------------------------------------------------------------
   Please enter the production application server hostname. [Default: localhost]


 ------------------------------------------------------------------------------
   Please enter the production application server port number, Typical values
   are 7003 for WebLogic, 8080 for JBoss and Tomcat, and 9080 for WebSphere.
7003

 ------------------------------------------------------------------------------
   Please enter the preview hostname. [Default: localhost]

 ------------------------------------------------------------------------------
   Please enter the preview port number. Typical values are 7003 for WebLogic,
   8080 for JBoss and Tomcat, and 9080 for WebSphere.
7003

 ------------------------------------------------------------------------------
   Please enter the context root of the preview application. [Default: crs]
Store

 ------------------------------------------------------------------------------
   Enter the hostname of the user segment server. Oracle recommends using the
   Publishing server for this purpose. If your environment does not have a
   Publishing server, enter the Production server host name and refer to the
   Guided Search Integration Guide for additional configuration requirements.
   [Default: localhost]


 ------------------------------------------------------------------------------
   Enter the HTTP port of the user segment server. Oracle recommends using the
   Publishing server for this purpose. If your environment does not have a
   Publishing server, enter the Production server HTTP port and refer to the
   Guided Search Integration Guide for additional configuration requirements.
   [Default: 8080]

 ------------------------------------------------------------------------------
   Specify the path for the Oracle Wallet jps-config.xml file. [Default:
   C:\Endeca\ToolsAndFrameworks\11.1.0\server\workspace\credential_store\jps-config.xml]

 ------------------------------------------------------------------------------
   Which directory will application configuration archives be exported to.
   [Default: C:\Endeca\Apps\CRS\data\workbench\application_export_archive]
C:\Endeca\apps\Store\data\workbench\application_export_archive

 ------------------------------------------------------------------------------
   Specify the port on which Oracle Endeca Workbench is running: [Default: 8006]


 ------------------------------------------------------------------------------
   Specify the port to use for the Live Dgraph: [Default: 15000]


 ------------------------------------------------------------------------------
   Specify the port to use for the Authoring Dgraph: [Default: 15002]


 ------------------------------------------------------------------------------
   Specify the port to use for the Log Server Component: [Default: 15010]


 ------------------------------------------------------------------------------
   Specify the path for the Oracle Wallet jps-config.xml file: [Default:
   C:\Endeca\ToolsAndFrameworks\11.1.0\server\workspace\credential_store\jps-config.xml]

 ------------------------------------------------------------------------------
   Specify the path for the application configuration archives to be exported
   to: [Default:
   C:\Endeca\ToolsAndFrameworks\11.1.0\server\workspace\state\repository]

07/06/2016 17:08:13 [AppDescriptorReader] INFO:  Parsing application descriptor
   file
   C:\Endeca\ToolsAndFrameworks\11.1.0\deployment_template\app-templates\base_descriptor.xml.
07/06/2016 17:08:13 [deploy.pl] INFO:  Processing install with id 'Dgraph'
07/06/2016 17:08:15 [AppDescriptorReader] INFO:  Parsing application descriptor
   file
   C:\ATG\ATG11.1\CommerceReferenceStore\Store\Storefront\deploy\deploy.xml.
07/06/2016 17:08:15 [deploy.pl] INFO:  Processing install with id 'CRSApp'
07/06/2016 17:08:23 [deploy.pl] INFO:  Application successfully deployed.

C:\Endeca\ToolsAndFrameworks\11.1.0\deployment_template\bin>


=========================================================================
This will create application and supported directories. Next you need to initialize the application in order to provision it. Once application is provisioned you can proceed with indexing and other activities. Optionally you can export CRS record store content , dimension value id manager data and import in new application. In this case you also need to export index-config for ATG user and import in new application.

Saturday 2 July 2016

Resolved | ATG 11.1 CRS TargetingException No value for the targeter parameter

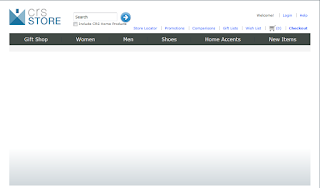
After ATG 11.1 CRS Setup. Home page targeter section was blank.

Here is exception from log : TargetingException No value for the targeter parameter

CRS Blank Page
CRS Blank Page

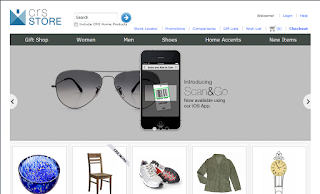
Solution : Start NoPublishing submodule [ADD Store.Storefront.NoPublishing in ATG module list in dynamo.env].

After this home page is displaying properly.

CRS Home Page
CRS Home Page

Resolved | ATG 11.1 CRS SetUp ATGJRE variable issue

While configuring CRS for ATG 11.1 encountered below issue.

ATGJRE Error
ATGJRE Error


Solution : Set ATGJRE environment variable. Don't forgot to include java at the end of the path. Otherwise you will get error

ATGJRE Path Variable